Exercise
Use a combination of quality, contrast, direction and colour to light an object in order to reveal its form. For this exercise we recommend that you choose a natural or organic object such as an egg, stone, vegetable or plant, or the human face or body, rather than a man-made object.
Setup
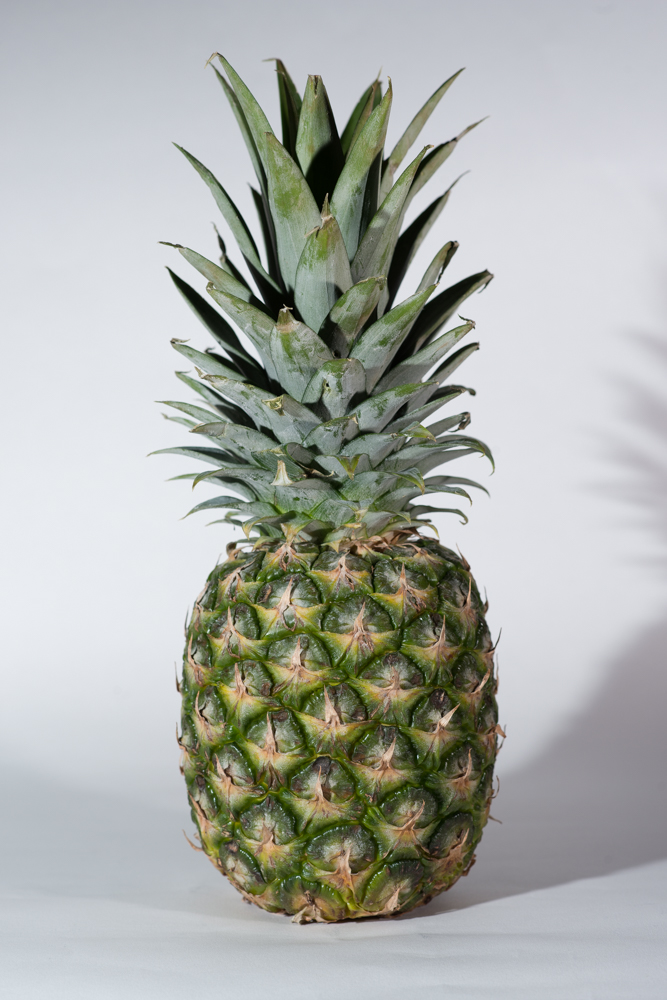
For this exercise I decided to capture a pineapple – partly due to the colours it has but also because of its textured surface and sprouting leaves which I thought would make a challenging but interesting subject to light.
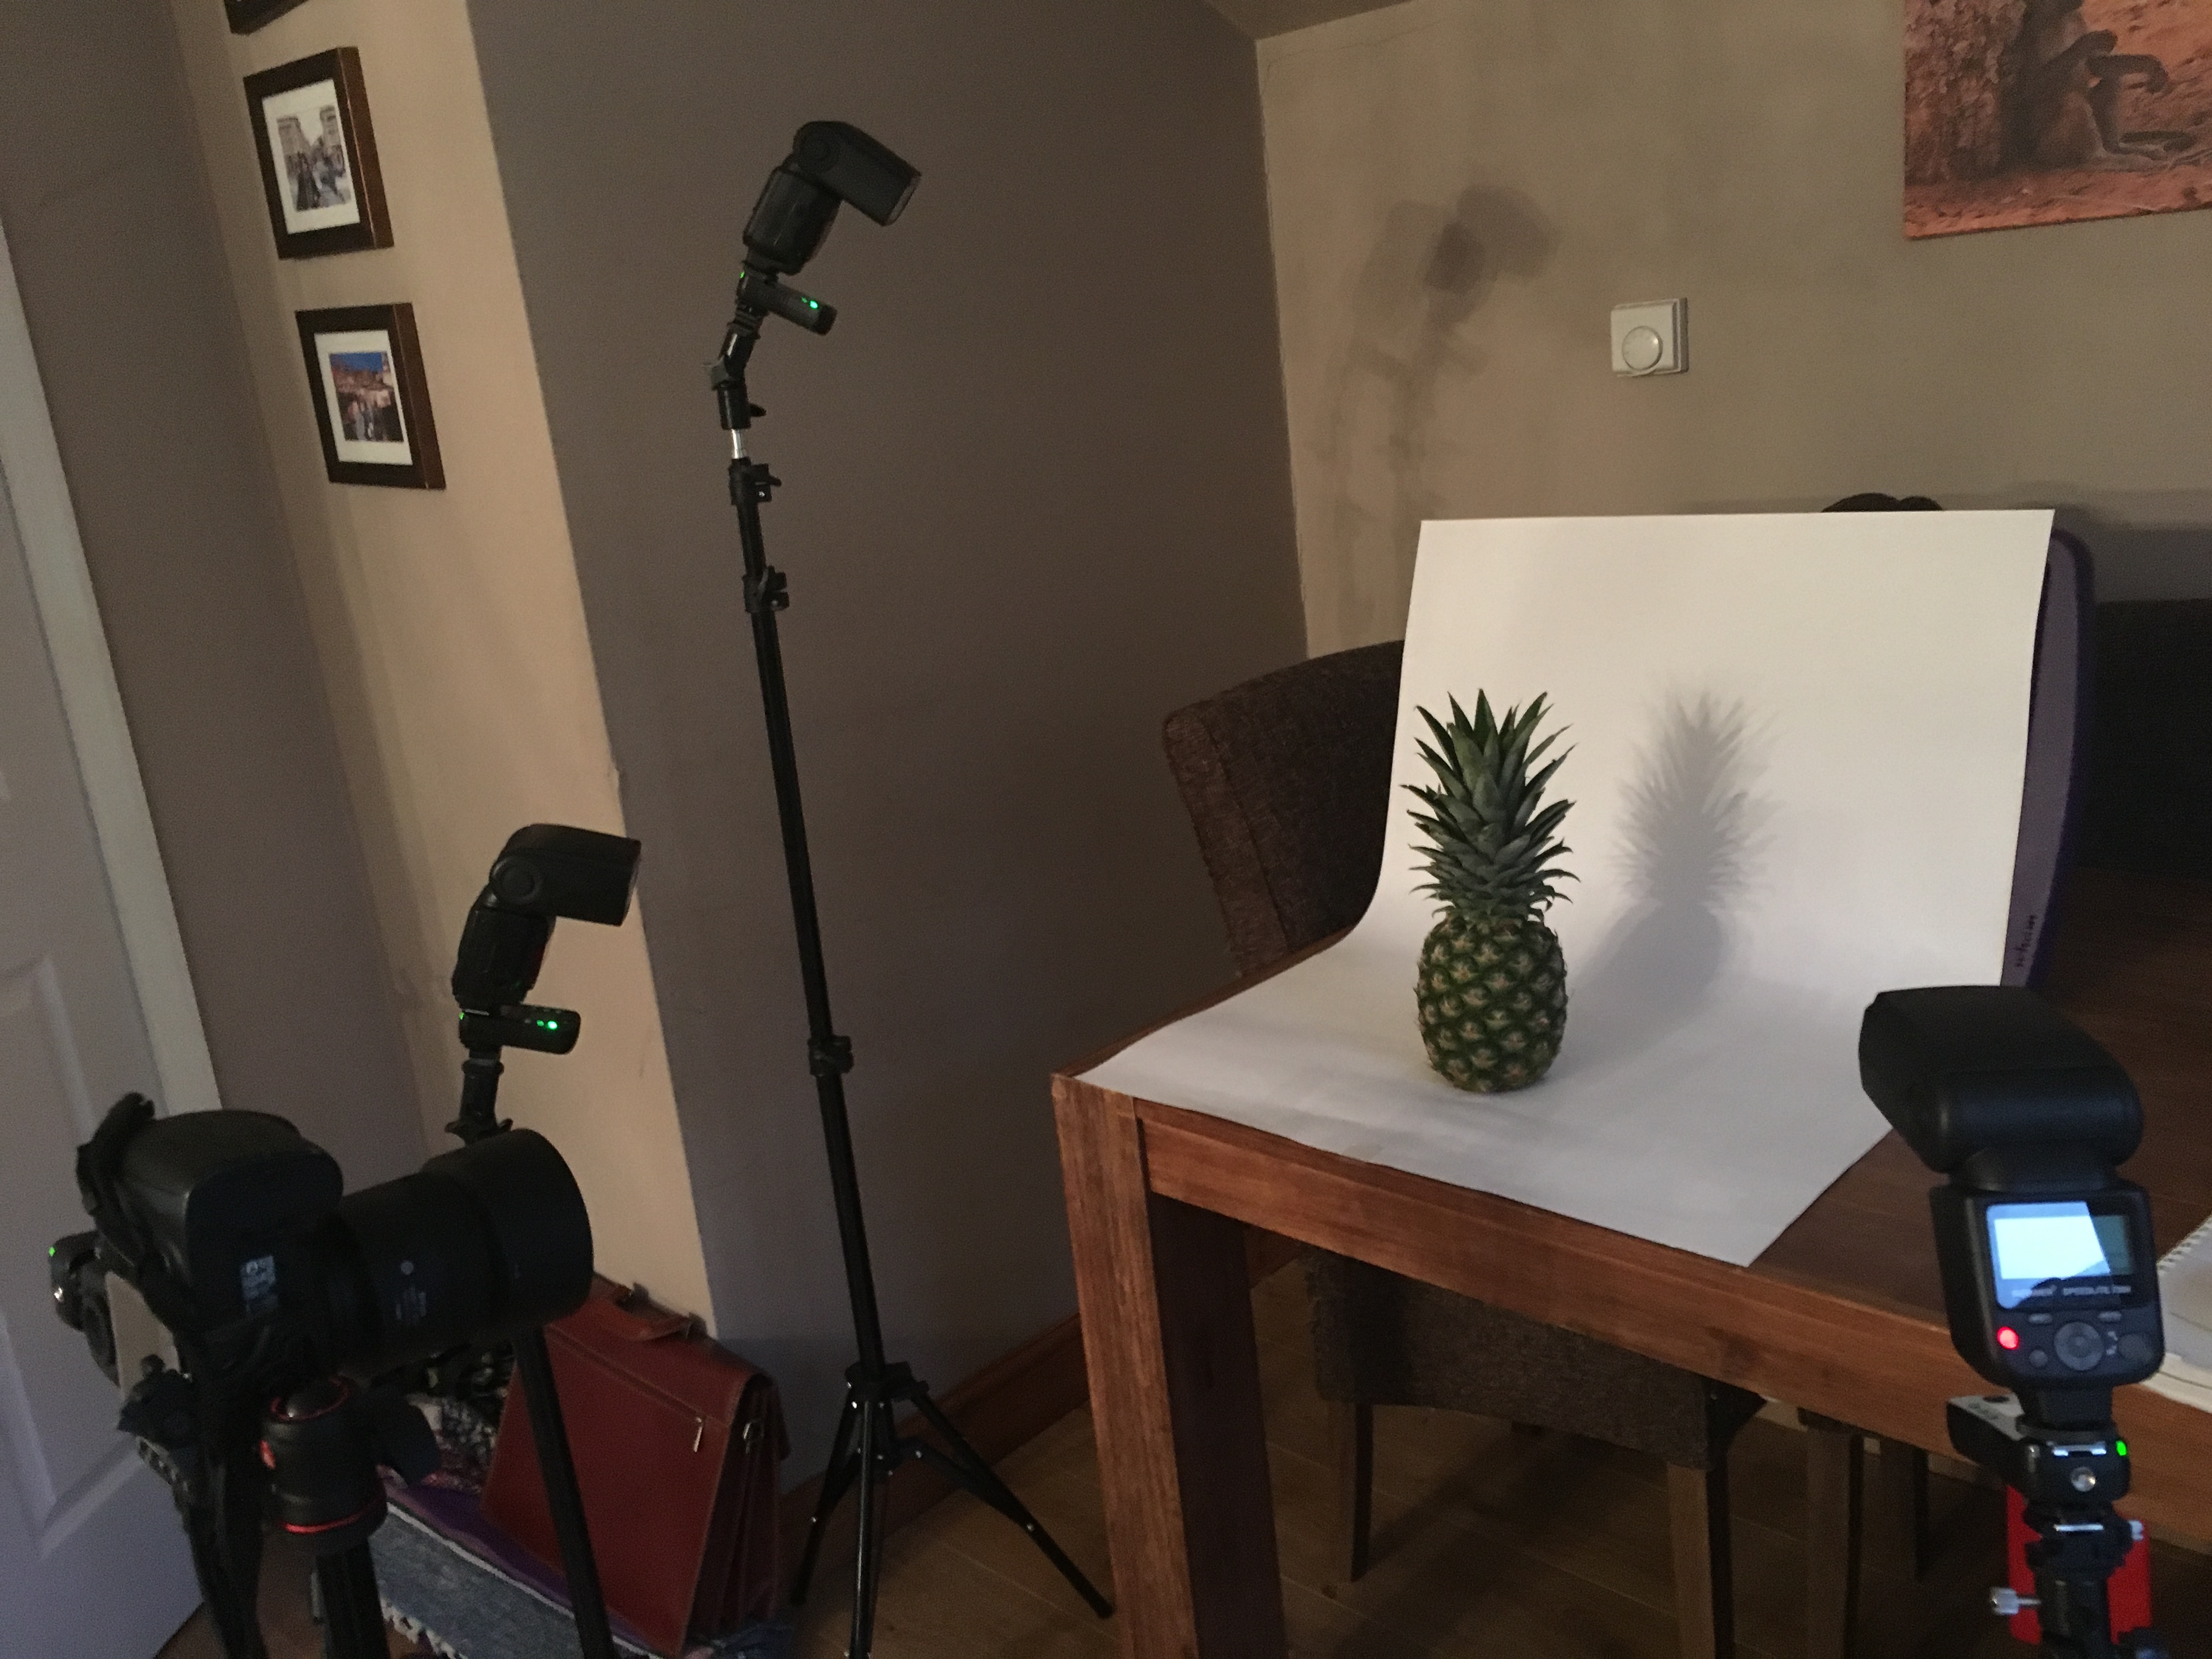
My initial setup is as shown below. I used a large white card to create an infinity curve and then placed the pineapple on the flat surface.
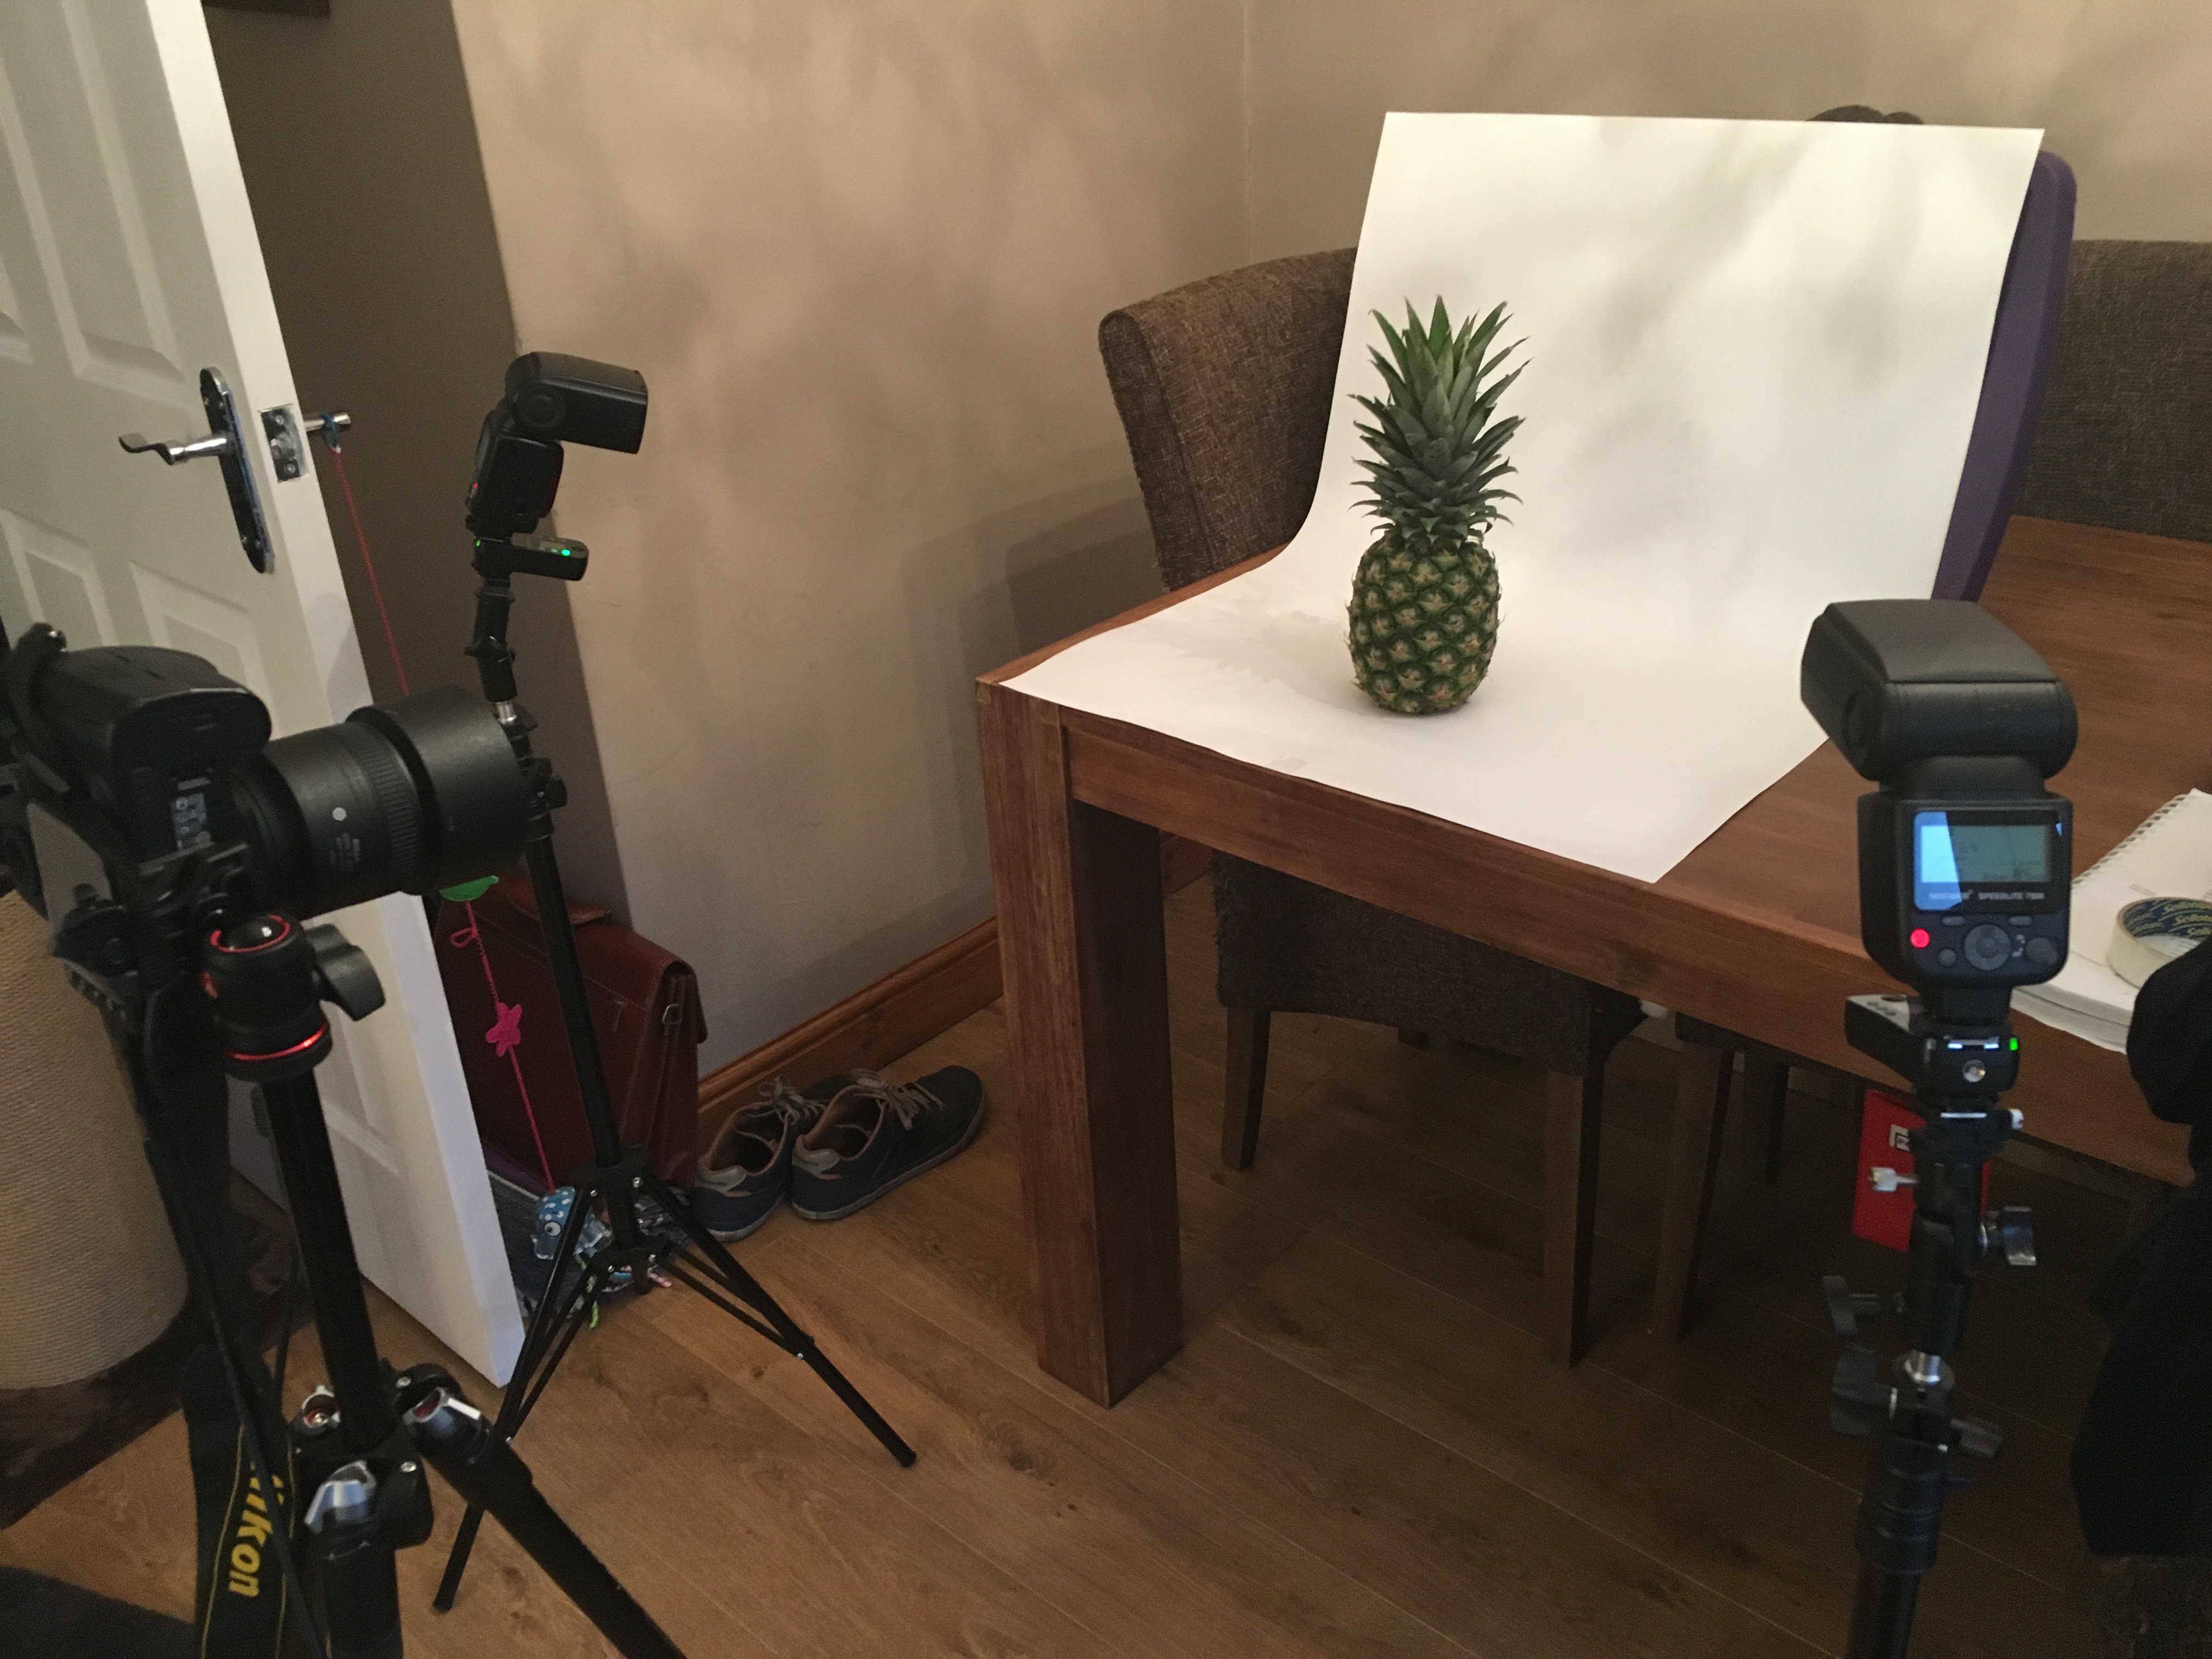
I positioned two speedlights to each side of the pineapple each pointed at a 45 degree angle towards the pineapple. I used radio triggers fitted to the camera and to each flash. Each flash was set to manual mode so that I could be in control and adjust the power setting of each flash as I progressed through the shoot.
My camera was fitted with an 85mm prime lens and positioned about 1 meter away from the subject and set in manual mode to 1/250 shutter speed, f9 aperture, and IS100. I connected the camera to my laptop and used lightroom’s tethered capture facility so that I could see the results on a large screen as I captured them. I triggered each shot directly from lightroom.
Shot Sequence
Shot 1
For the first shot I used only the flash to the left of the shot. I carried out a few test shots to establish the power setting that was needed for this flash, which is the key flash. The flash was set to 1/32 power.
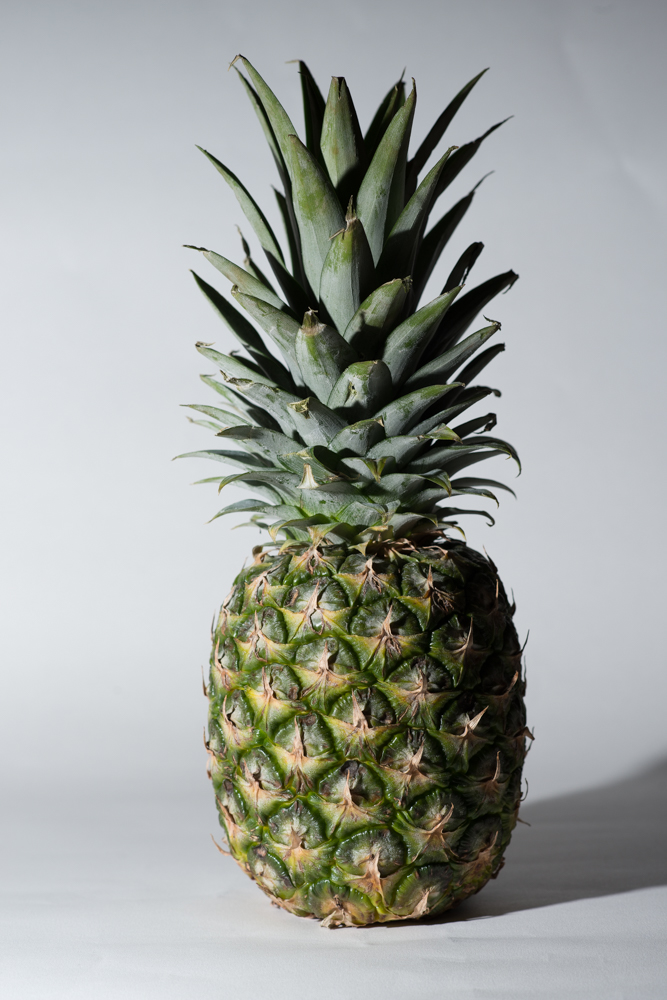
In this first shot, the pineapple left hand side and face are lit as I want them to be. The light has the following characteristics.
Quality – the light is very hard, the shadow to the right of the pineapple has hard edges.
Contrast – contrast is high. Not surprisingly as the right hand side is not lit and no reflector is in use, it is very dark compared to the left hand side.
Direction – the direction is clear due to the shadow. The light is coming from front left at a 45 degree angle.
Colour – at this stage, the light is white and the background is white.
Shot 2
In this shot I am holding a reflector off to the right of the pineapple.
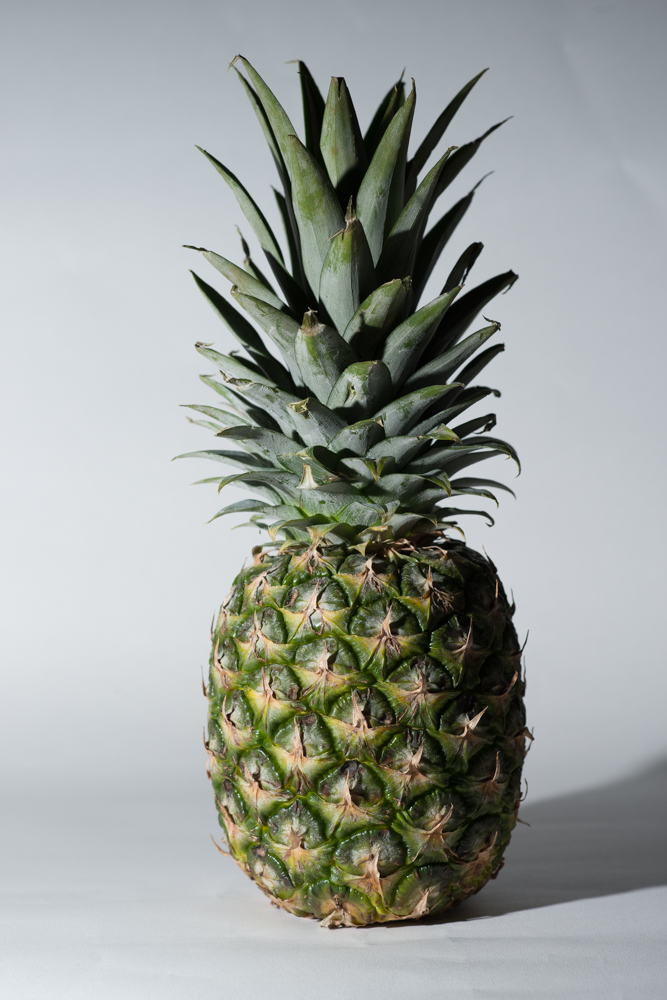
It has had the following effects:
Quality – the light is hard as with Shot 1
Contrast – there is slightly less contrast, the light reflecting back has lightened the shadows slightly but not by much.
Direction – shadows are unchanged from Shot 1
Colour – I was using a silver reflector. It is very hard to see with the images separated but on screen alternating between the two, it is possible to see that the shot is slightly colder (bluer) than Shot 1. I assume that this is because the harsh light of the flash is stronger than any ambient light coming from the room.
Shot 3
For this shot, I moved the left flash further away (1.5 meters instead of 0.75 meters), added the flip down diffuser built in to the flash, and increased the power of the flash to ¼ power to compensate for the extra distance and the diffuser.
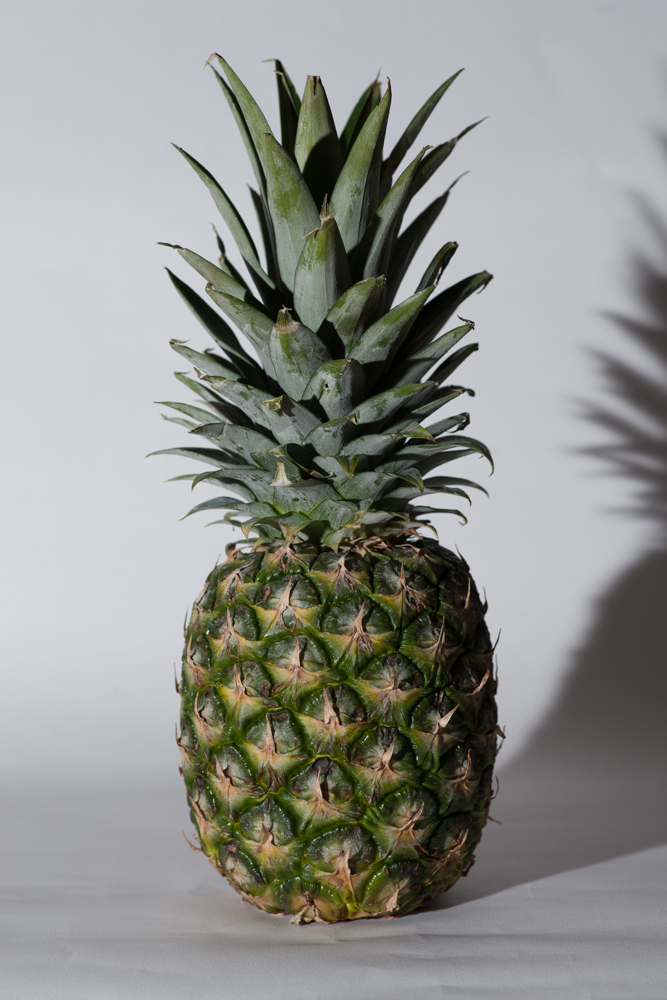
It has had the following effect:
Quality – Due to the addition of the diffuser, the light is somewhat softer, the edges of the shadow are more blurred.
Contrast – This is the same as shot 1 since nothing has been done to the right hand side yet.
Direction – unchanged from Shot 1
Colour – unchanged from Shot 1
Shot 4
For this image I have moved the left flash back to its original position and settings and I have now turned on the right hand side flash. This is set at 1/64 power which is less than the left side which is set at 1/32.
The characteristics are now as follows:
Quality – although both flashes are close and without diffuser, because it has reduced the shadows, the light appears softer. Closer inspection of the shadows does show a reasonably clear edge though which is denoting hard light.
Contrast – with almost equal lighting coming from both sides, there is very little contrast in the image and the pineapple is now appearing flat.
Direction – the two lights are each creating their own shadow hence there is now a shadow at each side of the pineapple.
Colour – this is still unchanged at white.
Shot 5
For this image I have added a third flash at 1/32 power which is to the left of the pineapple but positioned above and slightly behind it. The flash is pointing down and directly at the background. The setup can be seen here.
This is the outcome.
Assessment is as follows:
Quality – the light is still hard and now quite harsh on the pineapple.
Contrast – there is now hardly any contrast in the images as everything is brightly lit, only a small shadow is visible at the base of the pineapple.
Direction – It is possible to see three shadows, one for each flash unit. As the pineapple bulges in the middle, I found it impossible to get rid of the shadows underneath whilst using hard light.
Colour – all is still white.
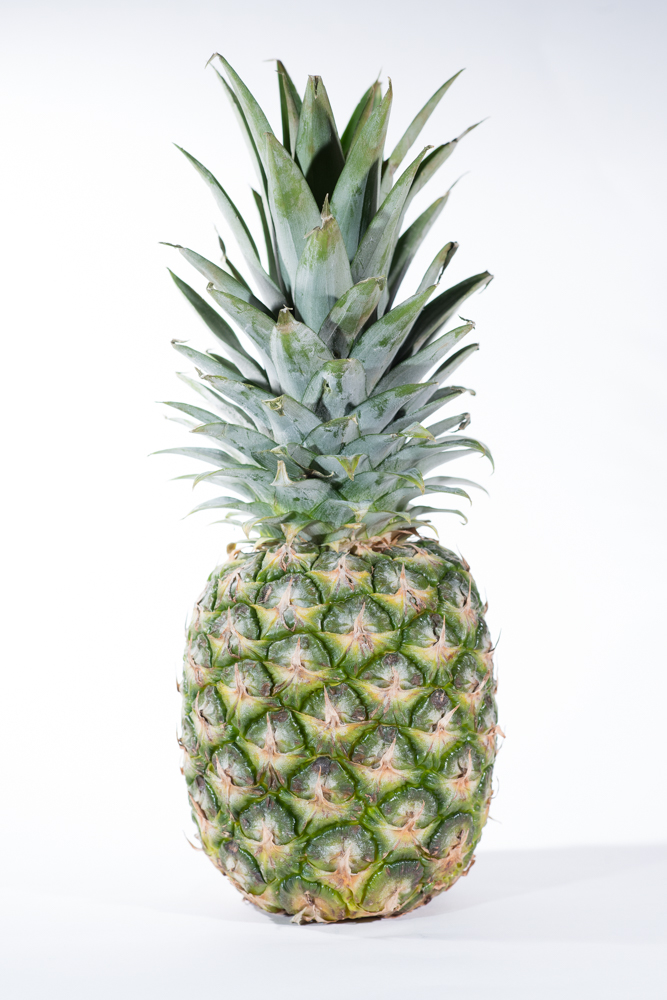
Shot 6
In this image I have reduced the power of the right hand flash to 1/128 power so that it is considerably lower than the left. The top flash is also reduced by half to 1/64
Assessment:
Quality – continues to be hard light with hard edged shadows
Contrast – I think this shot is the preferred lighting from the sequence. There is a good level of lighting across the face of the pineapple but it falls off to the right hand side creating a nice level of contrast and depth. The background is nicely lit and even.
Direction – still as per previous shots
Colour – white as with previous shots.
Shot 7
Here I have added a blue gel to the top left flash. This can be seen on the background and on left hand parts of the pineapple itself.
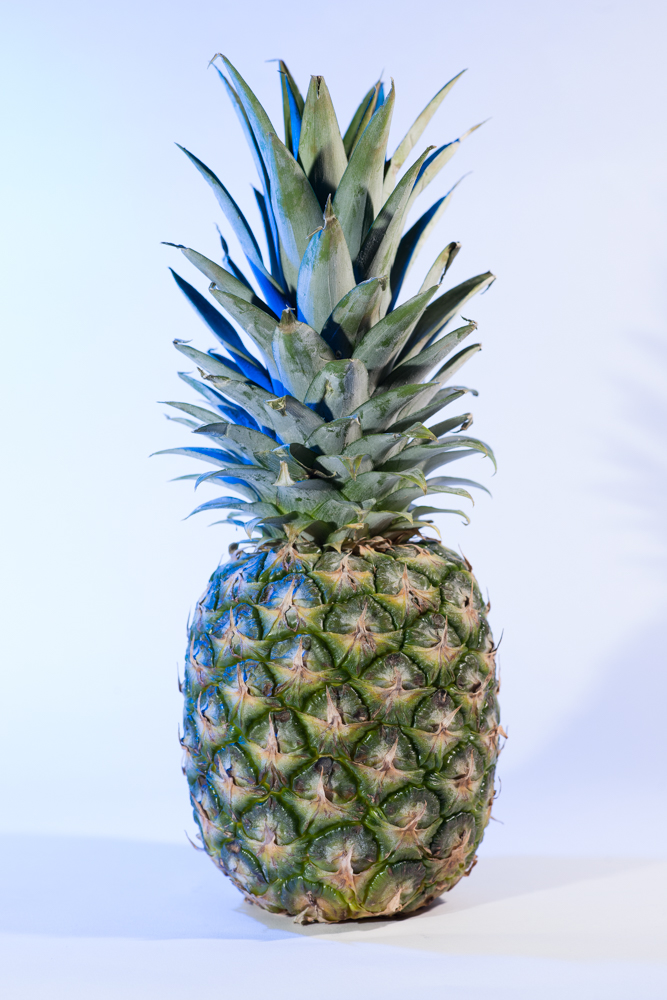
Assessment:
Quality – remains hard with shadows visible
Contrast – the contrast levels achieved in Shot 6 are maintained.
Direction – as previous shots
Colour – there is now blue tinge to the background and blue lighting on the left of the pineapple.
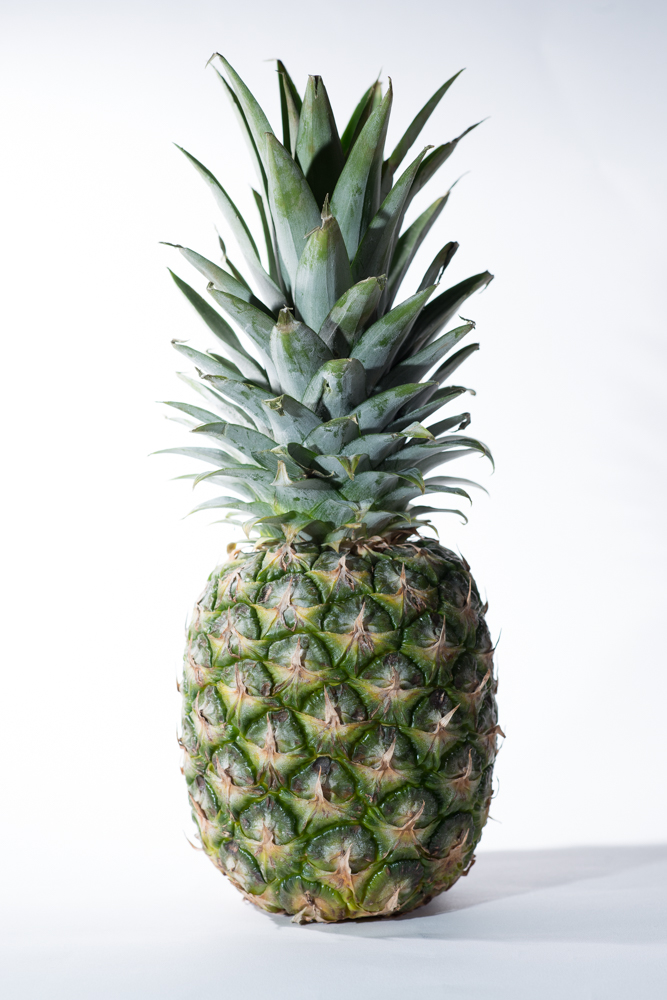
Shot 8
Here I have replaced the left hand key light with a soft box and I have set the right hand flash (which is still a direct light) to 1/128 power in order to light any shadows whilst retaining contrast, this flash is also angled slightly more away from the pineapple itself.
This is the set up

And this is the resultant shot
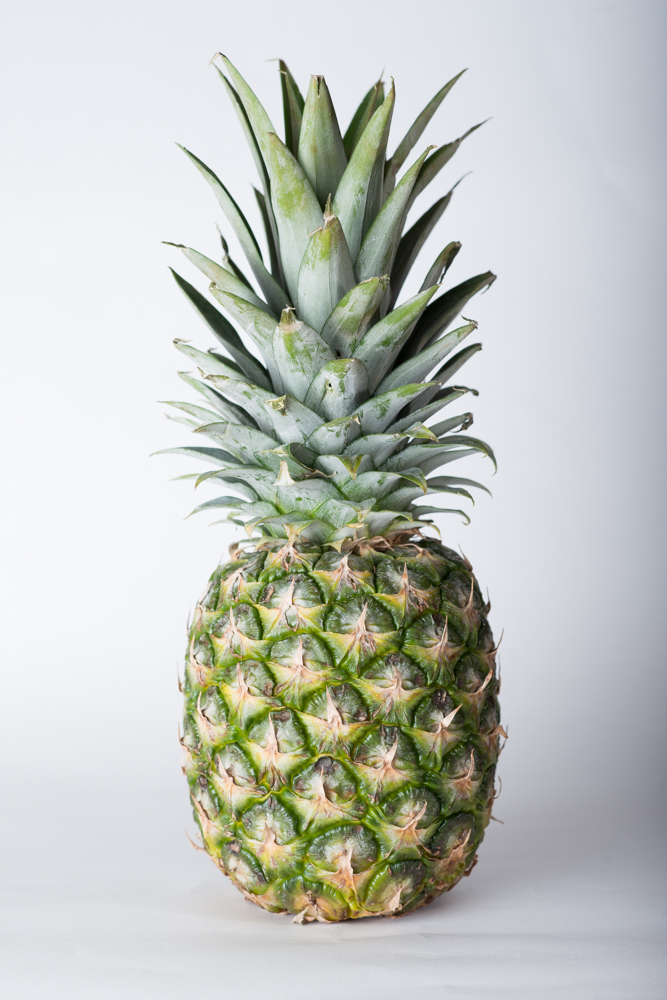
Assessment:
Quality – the light is now soft, there are no distinct shadows in the image. It is a very different shot to Shot 6 which was my preferred hard light shot.
Contrast – there is still a nice contrast as the light is falling off to the right hand side of the image.
Direction – without the shadows it is a lot harder to assess the direction of the main light although the fall off of the light to the right of the pineapple does suggest it.
Colour – colour is white.
Shot 9
Here I have kept the lighting set as for Shot 8 but I have changed the white background card for a blue card and removed the blue gel. I chose blue as it is at the opposite side of the colour wheel to the green and yellow of the pineapple.
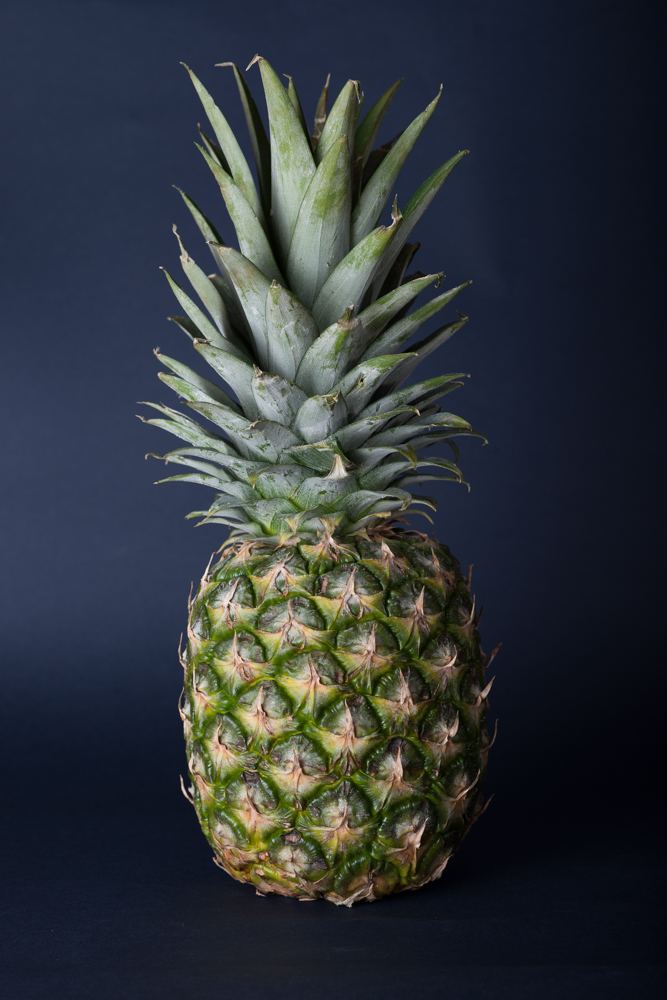
Assessment:
Quality – the image retains the soft light of Shot 8
Contrast – the contrast across the pineapple is as per Shot 8 however the darker background seems to accentuate the texture of the pineapple surface – perhaps because the glare of the white is removed and therefore attention is drawn to pineapple itself.
Direction – as with Shot 8 it is just possible to see that the main light is to the left.
Colour – changing the background has made a huge difference to the colouring of the whole image and resulted in what is my favourite image of the entire exercise.
What I Learned
- Camera magazines wax lyrical about the automated TTL features of speedlites. I learned that taking manual control of each light gives very precise control over what light falls where. It is worth mastering these controls rather than relying upon automation.
- Setting the key light is very important as it affects the main look of the picture, but also it restricts your ability with other lighting that has to be subservient to the key light. In this exercise, I did move the key light backwards and forwards but once it was set, my main focus was on varying the other lights. On reflection, I could have experimented more with movement of the key light.
- The impact of hard versus soft light is stark. I was very surprised at the difference between my images with and without using a softbox for the key light. I had thought that using the built in diffuser would have had a similar effect to the softbox but the two approaches do not compare.
- Colour of background can make a dramatic effect to the look of the picture. It is worth experimenting with different backgrounds whilst shooting as it may cause you to change your lighting approach during the shoot. Whilst it is possible to change the background post-shoot in photoshop, the lighting is fixed so needs to be how you want it at the time, it is too late if the background is only changed later.